Royal Icing with Egg White
You can make Royal Icing the old-fashioned way with egg white. It isn’t safe to use raw egg white in the icing, so it should be pasteurized. You need a candy thermometer, but pasteurization is a simple process. I give you ingredient amounts for small and large batch icing. A small batch makes sufficient icing to pipe and flood one recipe of cookies.
Prep: 25 minutes
Difficulty: intermediate
Special equipment: candy thermometer
Ingredients
Small Batch Royal Icing
- 1 1/3 cups plus 1 tablespoon (156 grams) powdered sugar, sifted
- 1 large egg white
- 1 teaspoon water
- Small pinch cream of tartar
- Food color gel (optional)
Large Batch Royal Icing
- 2 3/4 cups plus 1 tablespoon (315 grams) powdered sugar, sifted
- 2 large egg whites
- 2 teaspoons water
- 1/8 teaspoon cream of tartar
- Food color gel (optional)
Directions
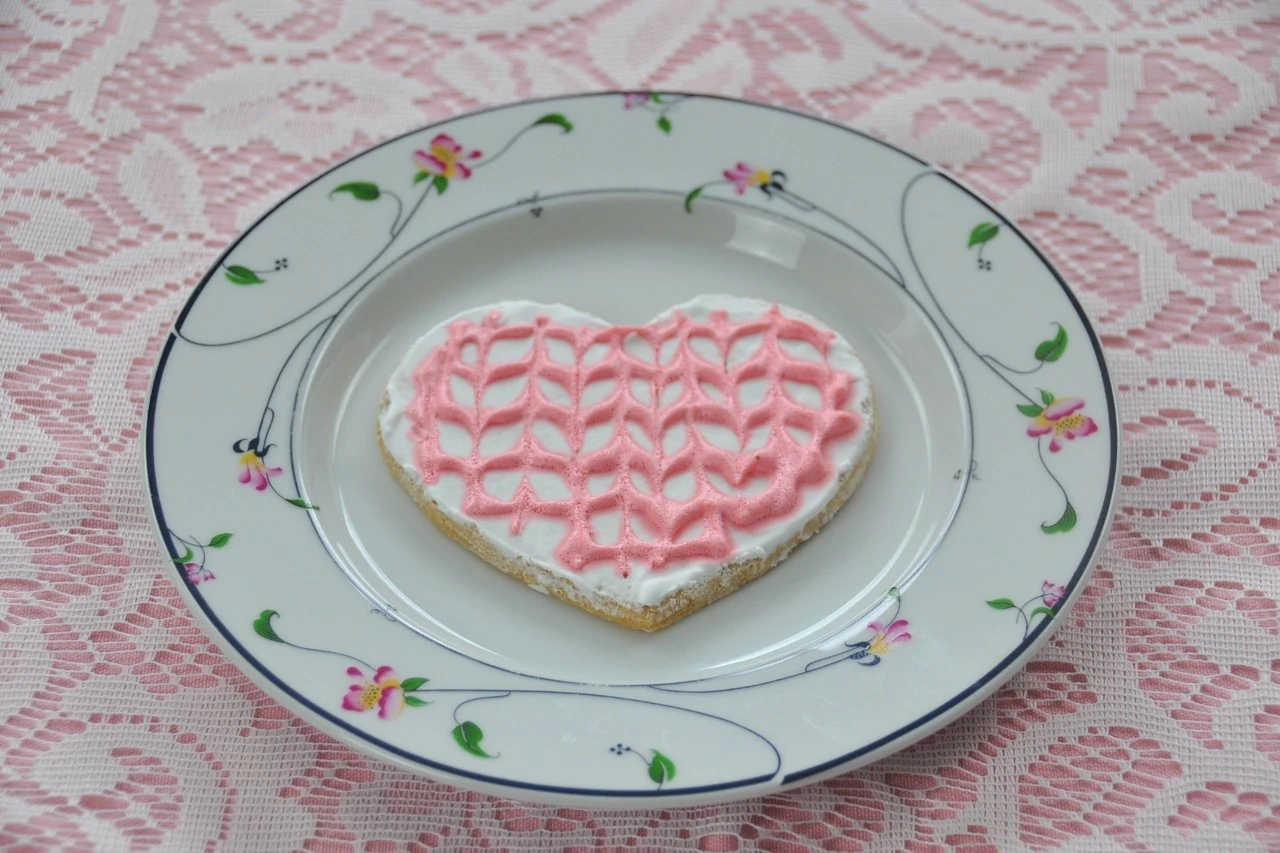
Decorate your favorite sugar cookies and gingerbread cookies with my Royal Icing.
Making Royal Icing
- Sift the powdered sugar into a medium bowl. In a heavy saucepan, top of a double boiler, or metal bowl placed over water in a saucepan, stir together the egg white(s), 1/4 cup of powdered sugar per egg white, water (see direction below), and cream of tartar. If you use an aluminum saucepan, eliminate the cream of tartar or the two will react and create an unattractive gray meringue.
- If you prefer to use raw egg whites without cooking to 160°F first, do not add water to the recipe.
- Cook the egg white mixture on low heat or over simmering water, beating constantly with an electric hand mixer on low speed, until the egg whites reach 160°F. You must test with a thermometer since there is no visual clue to doneness.
- When done, pour the egg whites into a medium or large bowl depending on the recipe used; make sure the bowl is super clean with no fat or grease. Add the remaining powdered sugar in 2 to 3 parts; gradually bring the mixer up to high speed and beat until the icing is glossy and holds thick, soft peaks, about 4 to 6 minutes. The icing will look like marshmallow crème.
- Divide the icing among clean containers, one for each color or consistency (piping or flooding) to be used. Tint the icing as desired with food color gel and gently stir in the color.
- Cover the bowls not in use with a damp paper towel and airtight plastic wrap to prevent drying. Use the icing right away or refrigerate until needed.
Decorating the Cookies
- Pipe decorations as desired (see "Tips") using a piping bag with a small round tip (#2 to #3). If planning to flood, use piping consistency icing around the perimeter of the area and let dry for 1 to 2 minutes.
- Do not thin the icing for flooding until ready for use. For flooding consistency, add a drop or two of water at a time and stir; you shouldn't need more than a few drops unless you are preparing a large amount. Check for proper flooding consistency by letting a spoonful drizzle back into the bowl. The icing should flow and disappear in about 5 seconds, but it should not be runny. Using a slightly larger round tip (#3 to #4), flood the cookie with icing from the outlined perimeter to the inside. Smooth or work out air bubbles with a toothpick. Let the icing dry completely before storing.
Tips
- Test Royal Icing for piping consistency by piping a small amount through your tip of choice. If it tends to curl back or is difficult to pipe out, the icing is too dry and needs a drop or two of water. Conversely, if the piped icing seems runny, add sifted powdered sugar, a tablespoon at a time, beating on low speed to blend. Do not overbeat or the icing will stiffen, lose its gloss, and develop air bubbles.